
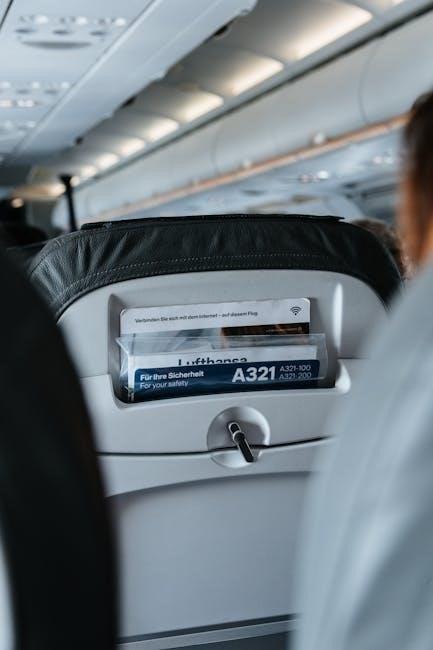
A pre-trip inspection is a critical step for Class A CDL drivers to ensure safety and compliance․ It involves checking the vehicle’s engine‚ tires‚ brakes‚ and more to identify any issues before hitting the road․ Using a detailed pre-trip inspection checklist with pictures or a PDF guide helps drivers systematically evaluate every component․ This process not only prevents accidents but also avoids potential fines and delays․ Regular inspections demonstrate professionalism and a commitment to road safety․

Importance of Pre-Trip Inspection
A pre-trip inspection is vital for ensuring safety on the road․ It helps identify potential issues with the vehicle before they lead to accidents or breakdowns․ By systematically checking components like tires‚ brakes‚ and lights‚ drivers can ensure their truck is roadworthy․ This process also promotes compliance with federal and state regulations‚ reducing the risk of fines or penalties․ Regular inspections help maintain the vehicle’s condition‚ preventing costly repairs down the line․ Additionally‚ a thorough pre-trip inspection demonstrates professionalism and responsibility‚ fostering a culture of safety within the transportation industry․ Using a detailed checklist or guide‚ such as a pre-trip inspection PDF with pictures‚ makes the process easier and more efficient‚ ensuring no critical components are overlooked․ This practice is essential for protecting both the driver and other road users․
Required Components of a Class A Pre-Trip Inspection
A Class A pre-trip inspection involves a thorough evaluation of the vehicle’s critical systems and components․ Key areas to inspect include the engine compartment‚ tires‚ brakes‚ suspension‚ steering‚ and trailer connections․ Drivers must check for leaks‚ wear‚ and damage in the engine area․ Tires should be examined for proper inflation‚ tread depth‚ and any signs of damage․ The braking system requires testing for air pressure and functionality‚ ensuring no leaks or malfunctions․ Lights‚ reflectors‚ and electrical systems must be functioning correctly for visibility and safety․ Suspension and steering components need to be secure and free from damage․ The coupling system between the tractor and trailer must be properly secured․ Using a pre-trip inspection PDF with pictures ensures all these components are systematically checked‚ helping drivers meet safety standards and regulations․ This comprehensive approach is essential for safe and efficient operation․

Benefits of a Detailed Pre-Trip Inspection
A detailed pre-trip inspection offers numerous benefits for Class A CDL drivers․ It enhances safety by identifying potential issues before they lead to accidents or breakdowns․ Regular inspections ensure compliance with regulations‚ avoiding fines and penalties․ By addressing minor problems early‚ drivers can prevent costly repairs and reduce downtime․ A thorough inspection also boosts driver confidence‚ knowing the vehicle is roadworthy․ Additionally‚ it promotes a culture of professionalism and responsibility․ Using a pre-trip inspection PDF with pictures simplifies the process‚ ensuring no critical components are overlooked․ This systematic approach not only protects the driver and others on the road but also extends the lifespan of the vehicle․ Overall‚ a detailed pre-trip inspection is a vital practice for safe‚ efficient‚ and compliant driving․
Key Components of a Class A Pre-Trip Inspection
A Class A pre-trip inspection involves checking critical vehicle systems‚ including the engine compartment‚ tires‚ brakes‚ lights‚ suspension‚ and coupling systems․ These components ensure safety and compliance․
Engine Compartment: Under-the-Hood Checkup
The engine compartment inspection is a vital part of the pre-trip process․ Drivers must check for leaks‚ worn belts‚ and damaged hoses․ Ensure all fluids‚ such as oil‚ coolant‚ and windshield washer‚ are at proper levels․ Look for signs of wear or cracks in the serpentine belt and verify that all connections are secure․ Check the air filter for cleanliness and ensure the battery terminals are tight and free of corrosion․ Properly mounted and secure components‚ such as the alternator and air compressor‚ are essential․ Use a pre-trip inspection PDF with pictures to guide your examination and ensure no critical issues are overlooked․ This step helps prevent mechanical failures and ensures the vehicle is roadworthy․ Regular checks demonstrate adherence to safety standards and reduce the risk of breakdowns․
Tire Safety and Inspection
Tire safety is a critical component of a Class A pre-trip inspection․ Begin by visually inspecting each tire for wear‚ cuts‚ bulges‚ or embedded objects that could compromise integrity․ Use a tread depth gauge or the penny test to ensure tread meets legal standards‚ which vary by jurisdiction․ Properly mounted and secure tires are essential‚ with no signs of leaning or misalignment․ Check for abrasions‚ bulges‚ or cuts‚ as these can indicate potential failures․ Refer to a pre-trip inspection PDF with pictures for guidance on identifying defects․ Ensure valve stems are secure and caps are in place to prevent air leaks․ Proper tire pressure is also vital for safety and fuel efficiency․ Any issues found during the inspection must be addressed before the vehicle is operated․ Regular tire checks help prevent blowouts and ensure safe operation․
Brake System Evaluation
The brake system evaluation is a vital part of the pre-trip inspection for Class A CDL vehicles․ Begin by walking around the vehicle to inspect brake components such as brake shoes‚ pads‚ and drums for wear or damage․ Ensure all parts are properly mounted and secure‚ with no signs of cracks‚ bends‚ or breaks․ Check for leaks in brake lines‚ hoses‚ or connections‚ as these can lead to system failure․ Test the parking brake to confirm it holds the vehicle stationary․ Apply the service brakes and listen for unusual noises or spongy pedal feel‚ which may indicate issues․ For air-braked vehicles‚ monitor the air pressure gauge during the test and ensure it does not drop more than 4 psi in one minute․ Refer to a pre-trip inspection PDF with pictures for detailed guidance on identifying defects․ Proper brake function is essential for safety and legal compliance;
Lights‚ Reflectors‚ and Electrical Systems
Inspecting the lights‚ reflectors‚ and electrical systems is a crucial part of the pre-trip inspection for Class A CDL vehicles․ Begin by checking all exterior lights‚ including headlights‚ taillights‚ brake lights‚ turn signals‚ and hazard lights‚ ensuring they are clean‚ unobstructed‚ and functioning properly․ Verify that reflectors are securely mounted and free from damage or discoloration․ For electrical systems‚ inspect the battery terminals for corrosion‚ check wiring for damage‚ and ensure all connections are secure․ Test the trailer light plug to confirm proper communication between the tractor and trailer․ Refer to a pre-trip inspection PDF with pictures for guidance on identifying defects․ Properly functioning lights and reflectors are essential for visibility and safety on the road‚ while a reliable electrical system ensures all components operate as intended․
Suspension‚ Steering‚ and Frame
The suspension‚ steering‚ and frame are vital components to inspect during a Class A CDL pre-trip check․ Start by examining the suspension system for any signs of wear‚ such as sagging springs or loose shackles․ Check the steering components‚ including the gear box‚ tie rods‚ and drag links‚ for tightness and proper alignment․ Inspect the frame for cracks‚ bends‚ or rust that could compromise structural integrity․ Use the pre-trip inspection PDF with pictures to identify potential issues․ Ensure all bolts and fasteners are securely tightened and there are no leaks from hydraulic components․ Proper functioning of these systems ensures stability and control of the vehicle‚ preventing potential accidents caused by mechanical failure․ A thorough inspection helps maintain safety and compliance with regulations․
Coupling System and Trailer Connection
The coupling system and trailer connection are critical for safe towing․ Start by inspecting the fifth wheel‚ ensuring it is properly lubricated and free from debris․ Check the locking jaws for proper engagement with the kingpin‚ making sure they are not damaged or worn․ Verify that the trailer brakes are connected and functioning correctly․ Examine the pintle hook or drawbar for any signs of wear or damage‚ and ensure it is securely attached․ For a trailer with an air brake system‚ test the emergency brake connection by pulling the trailer’s supply line․ Using a pre-trip inspection PDF with pictures helps visualize these steps and ensures all connections are secure․ Proper coupling ensures the trailer remains safely attached during transit‚ preventing accidents caused by detachment․ Regular checks are essential for maintaining safety and compliance․

Pre-Trip Inspection Checklist with Pictures
A detailed pre-trip inspection checklist with pictures ensures drivers systematically check all critical components‚ such as tires‚ brakes‚ and lights․ Visual guides help identify defects quickly‚ ensuring safety and compliance․

Visual Guide for Identifying Defects

A visual guide enhances the pre-trip inspection process by providing clear images and diagrams to help drivers identify defects․ These guides often include labeled pictures of critical components like tires‚ brakes‚ and lights‚ making it easier to spot issues․ For example‚ images of worn tires or cracked brake linings allow drivers to compare their findings with visual standards․ Many guides use color-coding or annotations to highlight common problem areas‚ such as bulges in tires or rust on the frame․ Additionally‚ they may include step-by-step instructions for checking complex systems like air brakes or suspension․ By referencing a visual guide‚ drivers can ensure they don’t miss critical inspections‚ leading to safer and more compliant trips․ This tool is especially helpful for new drivers learning the inspection process․
Step-by-Step Inspection Process
The step-by-step inspection process for a Class A CDL pre-trip ensures a thorough evaluation of the vehicle․ Begin with the exterior walk-around‚ checking for leaks‚ dents‚ and tire condition․ Next‚ inspect the engine compartment‚ focusing on fluid levels‚ belts‚ and hoses․ Move on to the interior‚ testing lights‚ gauges‚ and brakes․ Then‚ evaluate the suspension‚ steering‚ and frame for any damage․ Check the coupling system and trailer connection for security․ Finally‚ perform a brake test and ensure all safety devices are functional․ Using a PDF guide with pictures helps drivers follow this structured approach‚ ensuring no component is overlooked․ This methodical process minimizes risks and ensures compliance with safety regulations․ Regular practice of this routine enhances efficiency and confidence during inspections․
Common Defects and How to Identify Them
During a pre-trip inspection‚ common defects include worn or uneven tire tread‚ cracked brake linings‚ loose suspension components‚ and malfunctioning lights; To identify these issues‚ visually inspect tires for cuts‚ bulges‚ or uneven wear․ Check brake linings for cracks or excessive wear‚ and ensure the suspension and frame are free from damage or sagging․ Test all lights‚ reflectors‚ and electrical systems to confirm they are functioning properly․ Leaks under the vehicle‚ such as oil or coolant‚ are also red flags․ Using a pre-trip inspection guide with pictures can help drivers recognize these defects more easily․ By addressing these issues before departure‚ drivers can prevent potential accidents and ensure compliance with safety regulations․ Regular inspections also help maintain the vehicle’s overall condition and reliability․
Using the Pre-Trip Inspection PDF
A pre-trip inspection PDF is an essential tool for Class A CDL drivers‚ providing a structured checklist to ensure no critical components are overlooked․ These guides often include detailed visuals‚ such as pictures of defects‚ to help drivers identify issues like worn tires‚ cracked brake linings‚ or loose suspension parts․ By following the PDF‚ drivers can systematically inspect the engine compartment‚ tires‚ brakes‚ lights‚ and coupling systems․ The PDF also serves as a reference for understanding proper inspection terminology and procedures․ Many resources allow drivers to download and print these checklists‚ making them easily accessible․ Regular use of a pre-trip inspection PDF helps drivers develop a consistent routine‚ ensuring their vehicle is safe and roadworthy․ This practice not only enhances safety but also helps drivers comply with regulatory requirements․
A thorough pre-trip inspection is vital for ensuring safety and compliance․ Using a detailed PDF guide with pictures helps drivers conduct efficient checks‚ covering all critical vehicle components․
Best Practices for Conducting a Pre-Trip Inspection
To ensure a safe and efficient pre-trip inspection‚ follow established best practices․ Begin by thoroughly reviewing a Class A CDL pre-trip inspection checklist or PDF guide‚ which often includes pictures to help identify components․ Always conduct the inspection in a well-lit area to spot defects easily․ Start with the engine compartment‚ checking for leaks‚ proper mounting‚ and secure connections․ Move systematically around the vehicle‚ examining tires‚ brakes‚ suspension‚ and lights․ Use tools like a tread depth gauge for tires and ensure all electrical systems function correctly․ Reference the guide’s images to verify the condition of parts․ Document any issues found and address them before driving․ Consistency is key; stick to the checklist to avoid missing critical areas․ Regular practice will make the process faster and more effective‚ ensuring roadworthiness and compliance with safety standards․
Final Checks Before Hitting the Road

Before departing‚ conduct a final review to ensure all components are in proper working order․ Review the pre-trip inspection checklist or PDF guide to confirm no issues were overlooked․ Check that all lights‚ including brake lights and turn signals‚ are functioning․ Ensure the trailer is securely coupled‚ and all cargo is properly secured․ Verify that tire pressure matches the recommended levels and that there are no signs of wear or damage․ Test the brakes one last time to confirm they engage smoothly․ Scan the dashboard for any warning lights and ensure all gauges are within normal ranges․ Finally‚ double-check that all required documentation‚ such as the inspection report‚ is complete and stored appropriately․ These final checks provide peace of mind and help ensure a safe journey․